Electric Guitar Kit Single Cut : Great Kit, just reporting...
Here's the final result and description of the process:
>
>
Unfortunately, the front pliers were kinda ugly...not a nice top as in the picture. That said the end results came out awesome.
If you plan to stain the wood as I did, be aware that the wood sealer will be a PAIN to sand down. (would be better if they provided kits without any sealer) ..is specially difficult on the sides.
Overall, after sanding the wood has responded nicely to the dye, no problems at all with that. Went for Turquoise on the front and Red on the back, quite nice!
The neck is quite good! thin and the wood is quite robust. The hardware is also good, but I'm replacing the tuners with Grovers.
The bridge, well...really not the best, you can see is gonna catch the string after a bend....so I'm replacing it with a Göldo roller bridge. Be aware that the Göldo comes with smaller studs, so you'll need to redrill or fill the gap with something (I'm gonna use bits from a hose from a talkbox, it works perfectly)
I'm right now in the lacking process, so I cannot review the sound yet....I expect it to be more or less like my vintage Harley Benton which sounds lovely.
UPDATE:
I just finished the project.
Some tips:
- The nut comes REAL high! I suggest you to get a ruler and measure your best set guitar, take the nut out of the neck of this kit and carefully sand it down until is right...DONT TOUCH THE SLOTS they're perfect, is only the nut that is pretty high...otherwise you'll have intonation problems mostly on the first fret.
Hell, is almost impossible to properly play a bar chord at the first fret if you don't do that, after the nut is lowered the guitar plays like heaven.
- Try to avoid using the tuners and bridge that comes with it. They're simply not the best (good but there are better). Get a Göldo roller bridge and some Grover mini tuners.
- Use a piece of guitar string to be able to easily pass the cables that goes from the control cavity to the switch cavity.
- Don't forget to ground the electronics to the strings via the ground cable that goes to the bridge stud.
- Mark the cables before unplugging the switch. If you get lost install it all and plug the guitar then use a piece of metal (rounded small wrench works) and carefully tap the pickups to know whats going on until is right.
- Don't forget to lub the nut with graphite.
UPDATE: I've installed a locking nut and a Schaller stoptail with microtuners. Best decision ever!
UPDATE 2: Changed the original pickups which are very dull to a pair of Seymour Duncan hot rodded kit. They sound awesome.

Technical Data
- Manufactured by Harley Benton
- Released in 2007
- Average price : $107
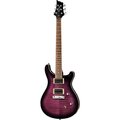
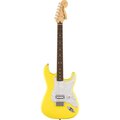
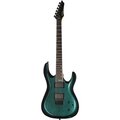
You may also like
2023 100%
2023 100%
2023 100%
2023 100%
2023 100%
2023 100%
2023 100%

2023 100%

2023 100%

2023 100%