Harley Benton Electric Guitar Kit Single Cut 4-stars Reviews
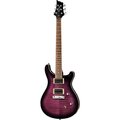
Harley Benton LP Kit
On opening I was impressed with the quality of the body - a better example than on the website, so I decided to go for an oil finish which looks superb. All expected parts were included (not always the case with kits!). Prefinished neck feels great, only an issue with one protruding fret that a rubber mallet soon sorted out. Neck joint spot on, no need to shim at all. Pick ups are fine, at least through my Marshall. Pots are the only poor point, with limited tone control but like most guitarists I suspect I'll use the amp for that. At this price a real bargain!
Harley Benton LP Guitar kit.
Anyone who has ever wanted a LP Guitar should look here. After buying the SG and being really happy with it I decided the LP was my next guitar. The quality of all the part is of a really high standard and I was really pleased to see the edge banding really well done. As with the other guitars from this manufacturer I've found the LP kit to go together really well. This time with the inclusion of the cream raised scratch plate the LP Kit looks the part. Once I'd finished the body in Red this time, It took no time to string this nice guitar, Adjustment of the bridge was simple and a little time taken to get the pickups right paid dividends. I now have a really nice guitar that is going to stay with me for a very lone time. I'm looking at other kits from Harley Benton and can't decide if the Rock or V is going to get my attention next. It looks like I'm going to have a nice collection of Harley Benton guitars. Totally recommended.
Les Paul Kit
I had previously helped my son to build a flying V kit. I wanted to do one for myself, so I went for the Les Paul.
The kit came with instructions, but they were in German. I had previously made the flying V without instructions, so this wasn't a real problem, but I now know they are on the internet.
The body and neck were much better wood than I was expecting and the finish was very good. I just used some extra fine emery paper to give it a bit of extra smoothness.
Varnishing was the trickiest thing and took the longest time. There is a lot of fiddly masking if you want to retain the colour of the plasting edgings. I wanted a light coloured wood grain finish and I used about 4 coats of lacquer, which was just right for the colour, but not enough for protection. It needed several more layers of clear varnish. It was also difficult to get the masking perfect, so I need to learn how to get that right next time.
Everything worked except for the volume pots, which were poor quality. I replaced them with some better ones, which work really well, so I had to brush up on my soldering skills. Otherwise everything was connected using in line plugs in the cables, but I had the good sense to mark the connectors in the loom so that when I pulled them apart for assembly, I could connect the right ones back together. This is not mentioned in the instructions.
I could not work out which way up the selector switch goes (even with English instructions), so that took a bit of trial and error.
There was no drilling for the ground connection to the bridge, which is shown in the instructions. I did not want to risk drilling, so there is no earth on the bridge. It hasn't caused me too many problems.
Some screws were missing from the kit. I had to improvise.
The sound is good. The action is easy and I am pleased with the result. I want to do another one now.

Technical Data
- Manufactured by Harley Benton
- Released in 2007
- Average price : $107
You may also like
2023 100%
2023 100%
2023 100%
2023 100%
2023 100%
2023 100%
2023 100%

2023 100%

2023 100%

2023 100%